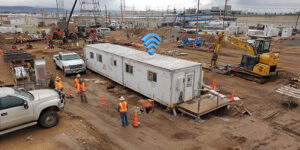
Setting up Wi-Fi on a construction site isn’t a fancy upgrade anymore, it’s just part of doing the job right. You already know how important it is to keep your team connected, your tablets synced, your security cameras live, and your subs from asking “where’s the latest drawing?” every 15 minutes.
But getting reliable Wi-Fi in the middle of a muddy field or half-finished high-rise? That’s where things get tricky.
At Design Tech, we’ve helped construction crews all over Charlotte, NC figure this out. From big downtown builds to remote land-clearing jobs, we’ve seen what works, what fails, and what saves the most time (and headaches). This checklist pulls together everything we’ve learned from the field, so you can get your jobsite connected quickly and keep it that way.
Know What You’re Working With
Before you bring in gear or start running cables, stop and look around.
Start with the lay of the land. Are you in a city, on a hill, in the woods, or on the edge of a new development with zero infrastructure? Every jobsite has its own challenges. Signal strength, access to power, and layout of trailers or temporary offices all make a difference.
Take a walk across the site and check your phone’s reception in different spots. If you can’t get at least two bars of LTE or 5G service across most of the area, you’ll likely need a signal booster or different setup altogether.
Also check power. Do you have temporary electricity installed yet, or are you running off generators? You’ll need a stable source to keep your router or hotspot running. No power, no Wi-Fi.

Pick the Right Type of Connection
Most jobsite Wi-Fi setups fall into one of three categories. Choosing the right one depends on your project’s location, timeline, and crew size.
For short-term or low-use projects, a basic 4G or 5G hotspot might do the trick. These are easy to set up, just plug them in and connect. But they’re limited. Once you have more than a few devices, or people start uploading large files, they slow down fast.
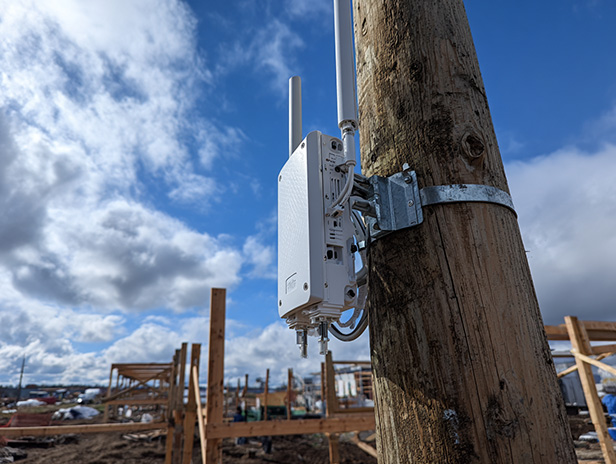
For larger sites or long-term projects, a better option is a rugged cellular router. These can handle more users and come with Ethernet ports for connecting trailers, security cameras, or site sensors directly. They’re also built to handle dust, vibration, and temperature swings.
If you’re way off-grid or staying put for six months or more, consider fixed wireless or even satellite internet. Installation takes more effort, but the connection will be more stable, especially when cellular signals are weak.
Set It Up for Real-World Use
Once you’ve picked your connection, the setup begins, and this is where most DIY jobs fall apart. It’s not just about getting a signal; it’s about getting a signal where people actually work.
Mount your router high, ideally on top of a trailer or pole. Line of sight matters more than you’d think, just putting the router 10 feet higher can double your coverage.
Inside the trailer, keep equipment dry, off the floor, and away from heat sources. Construction sites are rough on gear, so use waterproof cases, surge protectors, and zip ties to keep everything locked down and safe.
And don’t just stop once it’s online. Walk the site again with a tablet or phone and test your coverage. If there are dead zones, you can add range extenders or reposition the router. Wi-Fi on day one might not be good enough by day twenty, once steel goes up or more trailers roll in.
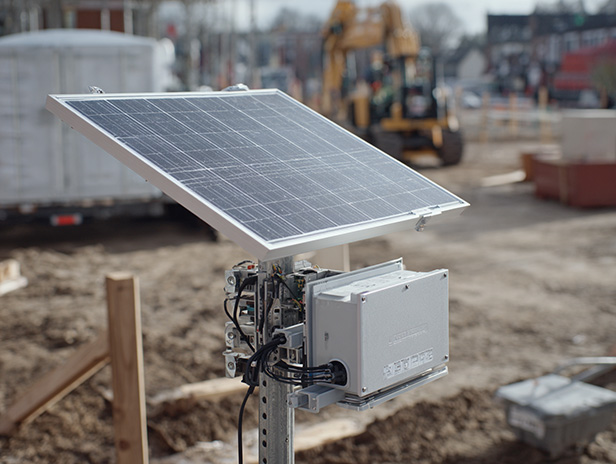
Power It Like You Mean It
Wi-Fi gear can’t run on hope and extension cords forever.
If your site doesn’t have stable temp power yet, you’ll need a reliable backup, either a generator with a clean power source or a UPS battery backup system. This keeps your internet from dropping every time someone fires up a chop saw or plugs in a welder.
We’ve seen too many sites lose camera footage or delay uploads because the power flickered for just a few seconds. A small battery backup can save you hours of downtime and frustration.
Lock It Down (Seriously)
Open Wi-Fi on a jobsite? That’s asking for problems. Anyone nearby can hop on, mess with your bandwidth, or worse, access your devices.
Always set up two networks: one for admin use (your routers, cameras, devices) and another for general crew access. Use strong passwords for both, and don’t share the admin one unless someone really needs it.
Some routers also let you see who’s connected and how much data they’re using. It’s a simple way to make sure the signal’s going to tools, not TikTok.
If you’re using the connection for security cameras or access control, consider enabling remote monitoring. That way, if something goes offline, you’ll know before someone else does.
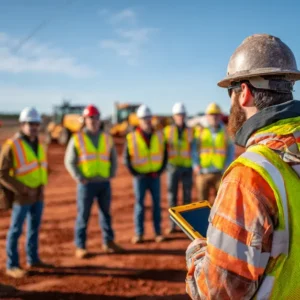
Stay Flexible as the Site Grows
Construction sites are living, breathing things. What works on week one might not work on week six. Buildings go up, trailers move, and crews grow.
Plan to revisit your Wi-Fi setup every couple of weeks. Are new crews on site? Add bandwidth. Did a new trailer block your signal? Move the router. Are uploads slowing down? It might be time to upgrade your data plan.
Wi-Fi isn’t a set-it-and-forget-it tool, it’s part of your jobsite infrastructure. And like all tools, it needs regular tuning to keep working right.
Get It Right the First Time with Design Tech
If you’ve ever spent half a day wrestling with routers, rebooting hotspots, or waiting for your cell provider to “look into it,” you know: this stuff is not always simple.
Design Tech makes jobsite Wi-Fi easy. We design, install, and support rugged Wi-Fi setups built for real construction sites, not cozy offices. We handle remote monitoring, camera integration, and all the behind-the-scenes stuff that keeps your crew connected and your project moving.
So if you’re tired of weak signals and wasted time, give us a call. We’ll get your site online fast, so you can get back to building.